

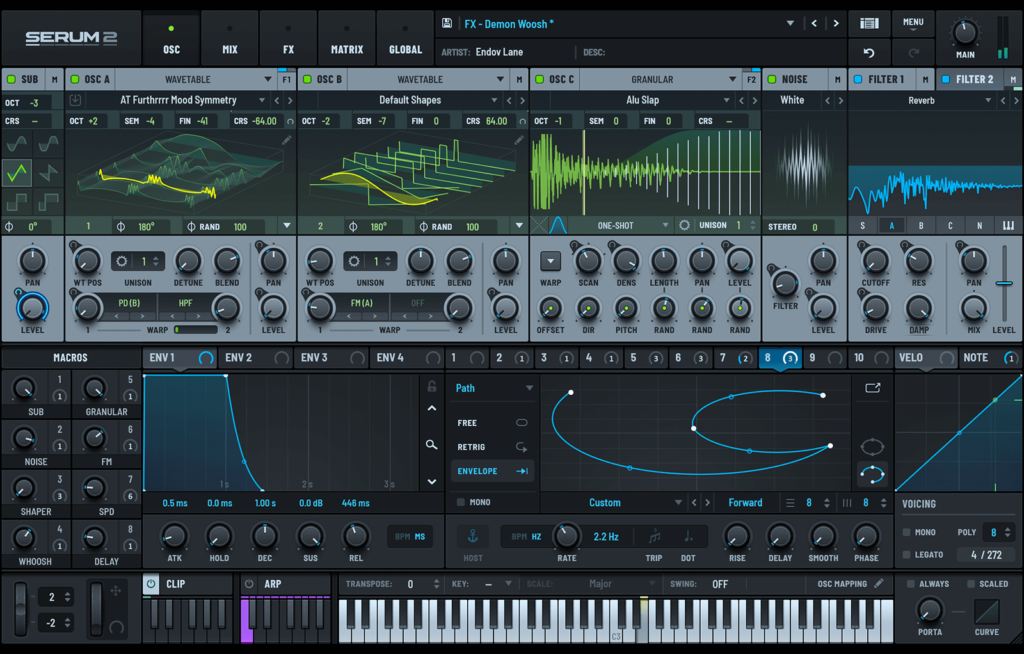
Serum is a paid VST from Xfer Records and does not ship with FL Studio, so you install it yourself. This guide covers installing both Serum and Serum 2 in FL Studio, then updating them and fixing common setup issues.
Is Serum included in FL Studio? No. FL Studio does not bundle Serum. You install it yourself, and it works well once you add your VST folder and point FL Studio at it.
Key Takeaways
- FL Studio does not include Serum. You install it yourself as a VST plugin.
- Add your VST folder to FL Studio’s plugin manager, then scan, so Serum shows up.
- Load Serum from the Channel Rack and activate it before your first sound.
- Keep Serum current through the Splice app or the Xfer Records portal.
- Most install problems come down to the wrong VST folder or a plugin that stayed disabled.
Installing Serum in FL Studio
This is the main walkthrough for adding Serum to FL Studio on Windows and Mac. Work through the six steps in order and treat them as your checklist. If your FL Studio setup feels cluttered, this guide to a cleaner FL Studio workflow helps you organise templates and folders at the same time.
1. Download the Serum installer
Log into your Xfer Records account and download the installer for your operating system. The file is about 85MB and takes roughly 2 minutes on a normal broadband connection. If you rent Serum through Splice, open the Splice app instead and install from its Plugins section. Splice handles the download and the license for you.
2. Run the installer and choose your VST folder
Open the installer and accept the license agreement. Choose a dedicated VST folder so FL Studio can find Serum later. I use C:\VSTPlugins on Windows and /Library/Audio/Plug-Ins/VST on Mac. Select both VST2 and VST3 when asked for maximum compatibility across DAWs.
Mac note: the default VST folder is /Library/Audio/Plug-Ins/VST, and macOS may ask you to approve Serum the first time you open it. Approve it in System Settings to avoid a Gatekeeper block.
3. Add your VST folder to FL Studio
Open FL Studio and go to Options > Manage Plugins. Click the folder icon in Plugin search paths, browse to your VST folder, and add it. If you organise plugins across drives, add every folder that holds VST files. This is the step most people miss, and it is the main reason the plugin stays hidden.
Pro Tip: This is the step most people skip. If Serum does not appear after scanning, come back here first and confirm your VST folder is actually listed in FL Studio’s plugin search paths.
4. Scan for Serum in the plugin manager
Click Find more plugins or Start scan depending on your FL Studio version. FL Studio checks your folders for VST files and lists what it finds. When Serum appears, right click it and make sure it is Enabled. A disabled plugin will not show up in the Channel Rack even after a successful scan.
5. Load Serum in the Channel Rack
Open the Channel Rack at the bottom of FL Studio and click the plus icon. Choose More to open the full plugin list, then search for Xfer Serum. Click it to add Serum as a new channel. Test it by loading a preset from Serum’s Menu and playing a few notes.
6. Activate your license
Serum opens a license window on first launch. Paste your 16 character serial number from the Xfer email and click Activate. Activation takes a few seconds online. Splice users skip this because the Splice app activates Serum in the background.
Once you finish all six steps, Serum loads in FL Studio and plays audio. If it does not appear, move to the troubleshooting section below.
System Requirements and Pre Installation Setup
| Requirement | Detail |
|---|---|
| Operating system | Windows 7 or newer, macOS 10.9 or newer |
| Disk space | About 200MB free |
| Plugin formats | VST2, VST3, AU |
| FL Studio | Version 12 or newer |
Serum runs on Windows 7 or newer and macOS 10.9 or newer, and it needs about 200MB of free disk space. It works as VST2, VST3, or AU, and FL Studio 12 and newer picks up all three. VST2 stays the most reliable choice. If you are running FL Studio on a MacBook Air, the lighter build keeps things quick while you add plugins.
Check that you have administrator access before you start. Installers fail when they cannot write to protected folders. Right click the installer and choose Run as administrator if Windows blocks the setup. Avoid installing Serum into Program Files, which is a common cause of permission errors.
Serum is not free. You buy it once from Xfer Records for $189, or rent to own it through Splice for $9.99 a month over 19 months. Both routes deliver the same plugin. Here is what you get:
- 144 built in wavetables
- 450+ factory presets
- Dual oscillators plus sub and noise generators
- Lifetime access to Xfer updates
Here is how the two purchase options compare.
| Purchase option | Cost | What you get | License |
|---|---|---|---|
| Xfer Records direct | $189 one time | Full plugin, 144 wavetables, 450+ presets, lifetime updates | Permanent, no app required |
| Splice rent to own | $9.99 a month for 19 months | Full plugin, 144 wavetables, 450+ presets, updates | Owned after 19 payments; Splice app needed while renting |
One thing worth knowing: Serum 2 shipped in March 2025. It sells for $249, but Serum 2 is free for existing Serum 1 owners, and it packs 626 presets and 288 wavetables. If you already own Serum 1, updating to Serum 2 costs you nothing.
If you want more instruments without spending more, this roundup of free VST plugins is a good place to look.
How to Update Serum in FL Studio
Updating Serum is quicker than the first install. These steps cover the Splice path and the direct Xfer path.
1. Open the Splice app or Xfer portal
Open the Splice desktop client, or log into your Xfer Records account and open the downloads page.
2. Check for the latest build
Both places show the newest Serum version. If an update is available, select it.
3. Run the update installer
Download and run the installer. It replaces your existing Serum build with the new one.
4. Confirm the new version in FL Studio
Load Serum in FL Studio and check the version number under Menu to confirm the update applied.
Direct buyers get update emails from Xfer Records. Splice users can turn on automatic updates in the Splice app so they never run an old build.
Warning: Before reinstalling, work through the checklist below. Most Serum install problems come down to a missing VST folder or a disabled plugin, not a broken installation.
Troubleshooting Common Installation Issues
Serum does not appear in FL Studio
Serum not showing up is the most common issue and usually comes from a missing folder or a disabled plugin. Work through this checklist in order:
- Confirm that Serum.dll or Serum_x64.dll exists in your VST folder.
- Open Options > Manage Plugins and add that folder to the plugin search paths.
- Click Find more plugins or Start scan so FL Studio rescans.
- Right click Serum in the list and make sure it is Enabled, not disabled.
- Load it from the Channel Rack by clicking the plus icon and choosing More.
- If you installed the 32-bit version of Serum but are running FL Studio 64-bit, the plugin will not appear. Rerun the installer and select the 64-bit version. FL Studio 20 and newer runs 64-bit only.
FL Studio crashes when Serum loads
FL Studio crashes while loading Serum in a small share of cases, usually from version conflicts. Update FL Studio from Image-Line and update Serum to the newest build. If it still crashes, raise your buffer size through Options > Audio Settings. These DAW settings matter for any plugin, and tweaking them fixes crackles and dropouts too.
Audio crackles or stutters
Increase the buffer size in FL Studio’s audio settings to 512 or 1024 samples for heavy Serum patches,, and turn on Smart disable for unused plugins to free up CPU. Draft mode inside Serum also cuts CPU load while you work on the arrangement.
Optimizing Serum for Maximum Performance
- Open Serum’s performance settings through Menu > Global Settings and adjust oversampling to balance CPU use with sound quality.
- Use Draft mode to cut CPU load while you work on the arrangement, and switch to High Quality mode for the final mix and render.
- Set custom preset folder locations through Menu > Preferences > Folder, and keep user presets in an organised structure.
- Back up the preset folder right after install. The default location on Windows is C:\Users\[Username]\Documents\Xfer\Serum Presets\Presets.
- Import wavetables from .wav files between 256 and 4096 samples long, placed in Documents\Xfer\Serum Presets\Tables, then click Menu > Rescan folders to refresh the library.
Frequently Asked Questions
Is Serum free in FL Studio?
No. Serum is a paid VST plugin from Xfer Records and is not free inside FL Studio. It costs $189 as a one time purchase, or $9.99 a month over 19 months through Splice’s rent to own plan.
Where is Serum in FL Studio after installing?
After you install Serum and add your VST folder, it appears in the FL Studio plugin manager under Xfer Serum. You load it from the Channel Rack by clicking the plus icon and selecting More.
How do I add Serum to FL Studio?
Open Options > Manage Plugins in FL Studio, add your VST folder to the plugin search paths, and scan for plugins. Once Serum shows up as Enabled, load it from the Channel Rack.
How do I get Serum in FL Studio?
Buy Serum from Xfer Records or rent it through Splice, then download the installer. Run it, add your VST folder to FL Studio, scan for plugins, and load Serum from the Channel Rack.
How do I update Serum in FL Studio?
Open the Splice app or log into the Xfer Records portal, download the newest build, and run the installer. Confirm the update by checking the version number inside Serum.
Conclusion
Installing Serum in FL Studio comes down to six steps: download the installer, pick a VST folder, add that folder to FL Studio, scan for the plugin, load it from the Channel Rack, and activate your license. Updating is a shorter version of the same idea.
If you hit a wall, check your VST folder and plugin status first, because those two cause most issues. Keep Serum and FL Studio current, back up your presets, and you are set for years of sound design.
What to Do Next
- Compare Serum against its most common rival: FL Studio vs Ableton.
- Pick the right host for your setup with the best DAWs for home studios.
- Avoid classic pitfalls in your DAW mixing workflow.
- Round out your setup with the best plugins for home studio producers.
- Add more sound to your chain with the best plugin bundles.