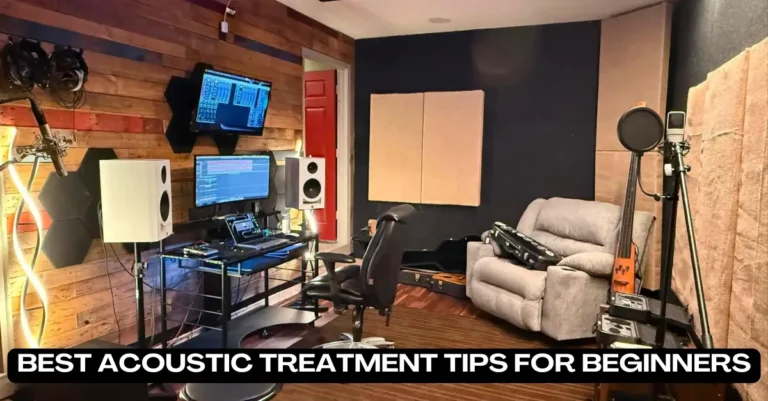

Where you put your desk determines what you hear. Not your monitors and definitely not your interface.
The desk position, the distance from the rear wall, the angle of your speakers. Get those wrong and no amount of EQ will save your mixes.
Key Takeaways
- Where you sit in your room affects what you hear more than your monitors do.
- The equilateral triangle rule (60-degree angle between you and each monitor) is the single highest-impact change you can make at zero cost.
- Bass piles up in corners. Treating them first costs less and does more than covering every wall with foam.
- Dedicated zones for recording and mixing reduce setup friction and keep sessions moving.
- A bad layout creates mix problems that no plugin can fix after the fact.
Quick Answer
The studio layout ideas that most improve your mixes: position monitors at ear level in an equilateral triangle with your listening position, treat room corners with bass traps before adding wall panels, and keep your back at least 1 metre from the rear wall. Everything else is secondary.
Why Studio Layout Affects Your Mixes (Not Just Your Comfort)
I’ve noticed that most beginner producers treat studio layout as a furniture problem. Move the desk in, plug everything in, start recording. That works fine until you notice your low end sounds different on every other speaker, or your mixes fall apart the moment you play them in the car.
The room is the issue. Sound reflects off walls, floor, and ceiling and reaches your ears fractions of a second after the direct signal. That smear is what makes home studio mixes hard to trust.
The layout you choose makes this better or worse, and no amount of plugin EQ fixes a room that’s lying to you about what the mix sounds like.
You don’t need a purpose-built room or thousands in treatment. You need to understand a few rules and apply them before you start dragging furniture.
The 5 Studio Layout Ideas That Actually Change How You Mix
1. The Equilateral Triangle: Get Your Monitor Position Right
The most common mistake is placing monitors too far apart, too close to walls, or pointed straight ahead instead of angled inward.
Here’s a rule of thumb I try to follow: your left monitor, right monitor, and your head should form an equilateral triangle. Each side the same length.
If your monitors are 1 metre apart, sit 1 metre from each monitor. Angle them inward so the tweeter points directly at your ears.
| Setup Element | Target | Common Mistake |
|---|---|---|
| Monitor spacing | Equal to listening distance | Too wide or too narrow |
| Monitor angle | Tweeters aimed at ears | Pointed straight forward |
| Listening height | Tweeters at ear level | Monitors flat on desk |
| Distance from rear wall | At least 1m | Chair against back wall |
I’ve set up my monitors wrong for longer than I’d like to admit. The moment I pulled them off the desk and got them on stands at ear height, the stereo image snapped into focus.
It’s the kind of difference you can’t un-hear.
Monitors flat on a desk let the surface bounce sound back at you. Stands or decoupling pads, if the budget is tight.
2. Keep Your Back Away From the Rear Wall
Sitting close to the rear wall causes bass to smear everything you hear.
When low frequencies bounce off the rear wall and reach your ears almost simultaneously with the direct signal, they cancel or boost certain frequencies depending on the exact distance. This is comb filtering, and it’s one reason your 200Hz sounds different in your studio than in anyone else’s.
Move your chair forward. Aim for at least 1 metre between your head and the rear wall. If the room doesn’t allow that, a broadband absorber behind you or even a bookshelf loaded with irregular objects breaks up the reflection enough to help.
3. Put Your Desk on the Short Wall, Not the Long Wall
Facing the short wall gives sound more room to develop before it reflects back at you.
Most rooms are rectangular. When you face the long wall, your monitors fire across the narrow dimension. Low frequencies pile up faster in shorter distances, so you hear more bass buildup. Flip the desk. Your monitors now fire down the length of the room, the rear wall reflection arrives later, and there’s less smearing at the mix position.
This is actually free, and there’s no treatment required.
The most common reason people don’t do it: the power outlets are on the wrong wall. I’d run a longer cable instead.
4. Treat the Corners Before the Walls
Bass traps in the corners do more acoustic work per rand spent than anything else.
Bass frequencies don’t travel in straight lines the way treble does. They wrap around objects and pile up wherever two or three surfaces meet, which is every corner of your room. Corner-mounted bass traps absorb these buildups before they reach the mix position.
A rough priority order:
- Floor-to-ceiling corner bass traps (front 2 corners first, all 4 if budget allows)
- Side wall panels at the first reflection points
- Rear wall panel directly behind the listening position
- Ceiling cloud above the mix position
I’ve also fell for the temptation (on a tight budget) to cover every wall with thin foam. Then I finally found that 5cm foam does almost nothing below 500Hz. Same money, denser material in fewer places does more.
5. Zone Your Space: Recording Area vs. Mix Position
Where you record and where you mix have different acoustic needs. Treating them the same is a compromise that hurts both.
A mic wants a quieter, more absorbent environment. Reflections that are fine at your mix position can muddy a vocal recording. Your mix position wants controlled listening, not a completely dead room.
If the room allows it, put absorption behind and beside the mic position in one corner, and keep the mix desk in the spot you’ve dialled in for monitoring.
In a room where everything sits within 2 metres of everything else, a portable vocal shield or a thick duvet draped behind the mic gets you most of the way there for nothing.
| Zone | Goal | Approach |
|---|---|---|
| Recording position | Reduce mic reflections | Absorption behind and beside mic |
| Mix position | Accurate listening | Bass traps in corners, panels at reflection points |
| Live or performance area | Optional isolation | Portable treatment or acoustic dividers |
How to Apply This to Different Room Sizes
Small rooms (under 10 sqm)
Small rooms are the hardest to work in. Bass buildup is more severe and positioning flexibility is limited. The rear wall problem is almost impossible to fully solve without treatment.
Equilateral triangle first. Bass traps in as many corners as you can fit. Vocal shield for recording. Don’t try to make a small room sound large.
Reference your mixes constantly on headphones and in the car, and check against commercial tracks you know well.
Medium rooms (10-20 sqm)
More options. You can usually achieve a proper equilateral triangle with 1 metre or more of rear wall clearance. Short wall desk position, corner treatment, and you’re in a reasonable working space.
Larger rooms (20+ sqm)
Bigger rooms bring different problems: late-arriving reflections from distant walls and uneven coverage across the space.
A dedicated control room zone within the larger room (defined by your treatment) works better than trying to treat the whole thing.
Who This Is NOT For
If you’re working in a purpose-built room with dedicated control room and live room already built to specification, these positioning principles apply differently. The physics are the same, but the geometry changes the specifics.
If you mix exclusively on headphones and don’t own monitors, room layout doesn’t affect your mix quality. That’s a separate conversation.
How We Put This Together
The principles here come from acoustic physics, not opinion. The equilateral triangle, rear wall distance, and corner treatment priority are consistent across acoustic research and practical guidance for untreated rooms. We’ve applied these in our own setup before writing.
Where we give specific measurements (1 metre, equilateral triangle distances), these are starting points. Trust your ears after you move things, and adjust from there.
Common Pitfalls
- Aesthetics before acoustics. Foam tiles look good in photos. A floor-to-ceiling corner trap does more for your mixes but nobody puts it on Instagram.
- New gear before a fixed room. A better interface won’t help if the room is lying to you.
- Moving only the monitors, not the desk. Your listening position matters as much as speaker placement.
- Thin foam on a budget. Denser material in fewer spots beats covering every wall with 2cm egg-crate foam.
- Mixing loud. Higher volumes excite room modes more. Mix at conversational level and your low end will be more accurate.
What to Do Next
- Set up your input chain: Best Audio Interfaces Under $200
- Pick the right mic for your recording zone: Dynamic vs Condenser Mic Guide
- Avoid the most common mix mistakes: DAW Mixing Mistakes Guide
- Choose the right DAW for your setup: Best DAWs for Home Studios
Frequently Asked Questions
Does studio layout really affect mix quality?
Yes, directly. The room colours the sound before it reaches your ears. A bad layout creates frequency buildups and cancellations that lead you to EQ for problems that aren’t actually in the mix. Fix the room first.
What is the equilateral triangle rule for home studio monitors?
Your left monitor, right monitor, and listening position should each be the same distance apart. If your monitors are 90cm apart, sit 90cm from each. Angle the tweeters inward so they point directly at your ears. Giving you an accurate stereo image and the most consistent frequency response.
Should I face the long wall or the short wall in my studio?
Face the short wall. Monitors firing down the length of the room gives bass frequencies more space before they reflect back. Facing the long wall shortens that distance and makes low-end buildup worse at the mix position.
Where should I put acoustic treatment first?
Corners. Bass collects where surfaces meet. Floor-to-ceiling corner traps in the 2 front corners do more work than foam panels covering every wall. Add first reflection panels on the side walls after that.
How far should I sit from the rear wall?
At least 1 metre from the back of your head to the wall. Closer than that, bass reflections from the rear wall arrive almost at the same time as the direct signal and cause comb filtering. A broadband absorber behind your chair helps when the room is too small to move further forward.
Do I need acoustic treatment to improve my mixes?
Not immediately. Correct positioning (equilateral triangle, short wall desk placement, rear wall distance) makes a real difference without spending anything. Treatment handles what positioning can’t, mainly low-end accuracy.
Can I record and mix in the same small room?
Yes. Use a portable mic shield or DIY absorption behind the mic for recording, and keep your mix position in the treated corner. You’ll need to be deliberate about switching between the two setups, but it works.
What is a first reflection point in a home studio?
The spot on your side wall, ceiling, or floor where sound from your monitor bounces directly toward your ears. Sit at your mix position and have someone slowly move a mirror along the side wall. The point where you can see a monitor in the mirror is the first reflection point. An absorption panel there cleans up the stereo image noticeably.
Conclusion
The 2 changes with the highest return per effort: get the equilateral triangle right, and move the desk to face the short wall. Neither costs anything. Both affect mix accuracy more than most gear purchases.
After that, corner bass traps. Then first reflection panels. Then everything else.
Your room is either helping your mixes or working against them. Most home studios fall into the second category, not because the gear is wrong, but because nobody moved the desk.